Click 'Add job' in the menu on the left.
A new form appears (to get back to the job list just click 'Job list' in the menu on the left).
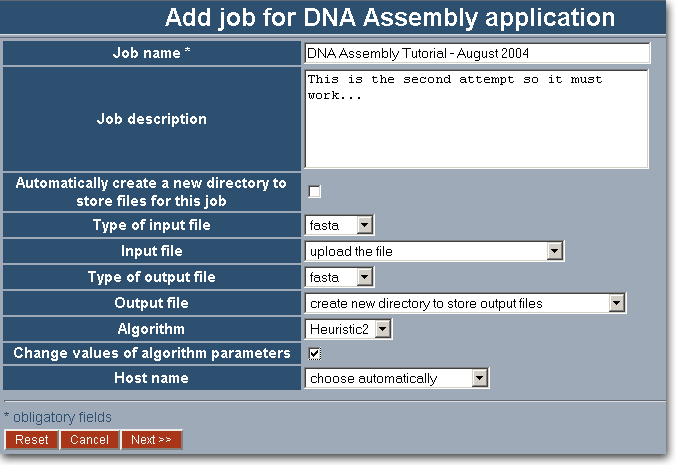
The field 'Job name*' is obligatory and it is the name of your job (i.e. 'DNA Assembly Tutorial - August 2004'). This name can be used as an identity for your job to enable you to quickly find it on the list of all your jobs. This field is obligatory and the job name cannot contain any '/'.
The field 'Job description' allows you to give some additional information about the job. This is the place where you can put your notes (i.e. 'This is the first attempt so it must work...'). It is not necessary to fill it in but you may find it helpful.

If the checkbox 'Automatically create a new directory to store files for this job' is marked, it tells the system to create a new directory (inside your user directory: "My data") to store the output data for this job. This directory has a name like: 'AssemblyJob(your job name)', which makes it easy to find it in the directory listing. If you do not mark the checkbox you'll be asked to choose the destination directory in one of the following steps (you will be also allowed to create a new directory for your job). Notice that when you mark this checkbox the 'Output file' field becomes inactive.
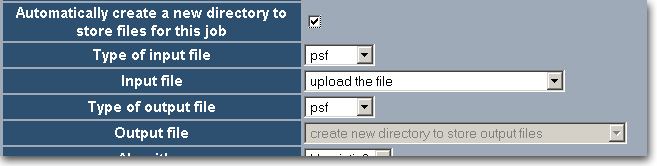
The DNA Assembly application uses a specially designed format for the input and output data. It is called psf. You may, however, use other well-known formats for your data if required. If you need other data format to be used this portlet will add a special data format converter to the job where necessary. To select the format of you input data choose its name from the 'Type of input file' dropdown menu. If you choose fasta or staden as you input data format the portlet will automatically add the input data format converter prior to the DNA Assembly application.

The field 'Input file' allows you to decide if you want to upload the input file from your local hard drive ('upload the file') or use a file that you have earlier uploaded to and already available in your "My data" directory ('choose the file from "My data" directory').
The 'Type of output file' field allows you to tell the portlet what data format should be used to store the results of your job. Again you can select psf, fasta or staden. If you choose fasta or staden the portlet will automatically add the output data format converter after the DNA Assembly application.
The output data is stored inside your user directory ("My data" directory). You can choose where to exactly store the output data with the use of the 'Output file' option list. You can create a new directory ('create new directory to store output files') or choose an existing directory from the "My data" directory" ('choose a directory from "My data" home directory'). This option list becomes inactive when you check 'Automatically create a new directory...' checkbox: in such case, the output files will be stored inside this new directory.
The 'Algorithm' dropdown list allows you to choose the algorithm you want to use for analyzing your data.
The 'Change values of algorithm parameters' checkbox allows you to decide whether you want to change the values for the algorithm parameters during the job configuration. Check this box for the opporutnity of changing the algorithm parameters. Leave the box unchecked to run your job with the default settings.
The last field, 'Host name', consists of a list of hosts where your job can be sent to. You can choose one of those or just let the system to choose one that is best sutiable to use at the current time with the 'choose automatically' option.
Click 'Next >>' to go to the next step.